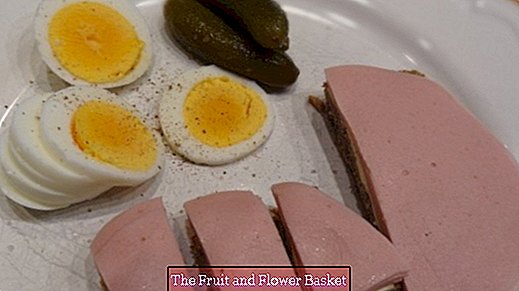
Boil eggs really hard and just peel
Time and again I hear from people that they have problems cooking hard eggs, and that they do not quite work out as they would like.
Even when egg peeling, I often hear complaints more often about the fact that they look quite tattered afterwards, so unappetizing. (I mean the eggs of course! ;-)) I'll show you today how to bring the lovely egg in all its beauty, from the shell.
The manual sounds more complicated than it really is in practice. After 2-3 times execution is very easy by the hand. Do not worry ...
You need that
- 2 eggs large / large
- 2 small cooking pots
- 1 hole maker or 2 tablespoons
Of course, this information can be applied to any quantity. Do you need more eggs z. B. 10, you just have to take a larger pot, where 10 eggs fit into it. By the way, it does not matter if you simply put the eggs on top of each other in the pot. Do not worry, no one will break it, as long as you carefully put them into the pot.
Step by step instructions
- Eggs directly from the fridge in the pot (always use only impeccable eggs.) Eggs that have fine hairline cracks or cracks, you must dispose of necessarily.This are also good for cake, etc. also nothing more, because of the increased bacterial hazard.)
- Cover with slightly cool to cold water. In any case, do not use hot water, the eggs could from this rapid temperature difference, only very cold from the refrigerator then very hot, get a shock and jump up! For eggs that are stored at room temperature, you also take the water at room temperature so lukewarm. Conclusion: The water should have about the same starting temperature as the eggs! :-)
- Now turn the stove to full speed and as soon as the water begins to boil, set the stove to medium level.
- You know how to set this on your stove. My plate has 10 levels, as soon as the eggs boil, I put them back on 6, and they do not jump around much when cooking. If they jump too hard, you can hear that, too, necessarily reset the temperature. You could burst from excessive vibration while cooking.
- Now set the time / stopwatch to 10 minutes. (With medium egg with 9 minutes, small egg with approx. 8 minutes)
- At the end of time, make a second pot full, with very cold water.
- Use a ladle or 2 tablespoons to fish the eggs and place them gently in the pot of cold water and place this pot in the sink.
- The water should be completely cold when it is too warm, pour it away and quickly fill with cold water. The eggs stay in the water for about 10 minutes.
- Then you can start peeling the first egg. I tap it once on the table slightly and then roll it so that the shell breaks into many small pieces.
- This egg then comes into the cold water and is peeled there in the water! Possible splinters sticking to the egg (from the shell) are also washed off immediately.
- Drain a little on a clean plate or on a piece of kitchen roll. Finished!
This may seem like a science to one or the other ... but as the practice shows, some of you are certainly looking forward to this tried and tested tip from me.
If the eggs inside are slightly greenish, you probably forgot to set the time, and they cooked much longer than 10 minutes. This is a physical process and says nothing at all about the enjoyability of the egg! It's just not so nice to look like a bright yellow yolk.


