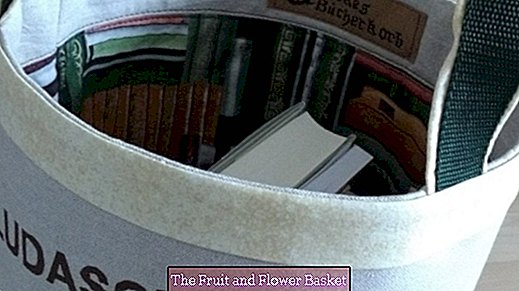
Book Basket: SnapPap meets fabric!
I have already mentioned my book basket several times during the preparation of the print and the label, but I would like to present it today and here in its entirety (because it's finished!):
Materials:
- Outer fabric: outdoor decoration fabric, tightly woven
- Lining / Book Material: Pure cotton
- Inside, top: see decorative fabric (sand)
- Trim strip outside, top: rest cotton (yellow)
- Webbing, polyester
- SnapPap: bottom, edge outside, bottom and for the label "Bücherkorb"
- Decovil I (the solid!) To reinforce the outer basket area
- Decovil light to reinforce the floor area
- Vlieseline H250 for slip and trim strips and handle back
- Volume fleece H640, iron-on, as padding for the inner basket
- Twill label, sideways
Steps:
The book basket is initially made of two individual baskets (inner basket with handles and outer basket). At their common upper edge of the (yellow) trim strip is sewn, which combines the two baskets to form a basket. When he (the last thing!) Is turned out, the previously "hidden" handles come back to the fore!
- In order to find the "right" measure for my project, I took a waste paper basket, put books in it and examined them.
- All parts cut out (Figure 14 lists all parts, includes their dimensions and the possible reinforcement) - my measurements include a seam allowance of 1 cm.
- On the sand-colored outer fabric / Dekostoff the words stencil (see my other tip "stenciling with Freezer Paper").
- label Make "... book basket" (see other tip "Old meets Modern ...") and quilt on the right side of the fabric of the inner, upper document strip.
- Iron parts x, y, z ... as indicated with Vlieseline / Decovil ... - exception: both lining basket surfaces (bookcase fabric + slip, top).
- Henkel quilt on a strip of cotton fabric because of the adornment.
- Roughly stitch the side seam of the outer fabric (do not quilt): try Henkel on and test her length as well as the distance the Henkel ends establish.
- record slip (Decorative fabric) to the upper edge of the lining fabric.
- The only complete forage area in one with Vlieseline behind iron.
- SnapPapStitch strips at the bottom of the outer fabric and decorate the seam from the right side if necessary with thicker decorative quilts and a larger stitch length.
- Finished handle (with me with the left = yellow side) so on the right side of the Futterstoff-lfäche stuck that the handle ends flush with the top of the basket and with its closed edge / rounding in the basket inside - on the Lining lying - "hang". Do not worry, the handles will go back to the top during the sewing process and then become visible again :-)
- Roughly stitch or quilt the ends of the handles with the machine on the seam allowance of the lining - so that the ends of the handles do not slip when sewing the inner and outer basket together.
- Close all side seams: on the lining material, on the outer fabric (possibly catching a label) and on the (yellow) stocking strip, which can be seen later on the outside of the basket edge.
- Quilting the forage to the ground: The in basket is done - check again: The right side of the fabric of the ring surface and the ground touch each other!
- Quilting the outer fabric surface on the SnapPap floor - again right to right here: Now is the outside basket Sewn ready, but the right sides of the fabric are not yet outside ...
Combine both baskets into one basket
Please keep in mind: With the finished basket, only the outer basket with its right side of the fabric should point towards the viewer, but the feed basket with its right side of the fabric should follow Inside show, so that you can see the pretty book cloth = right side of the fabric when looking. Between The baskets should project upwards / outwards on both baskets!
- This must be the first of the Outer basket turned because we sewed the right sides together - so they are still inside. This turning was a messy job here, because on the ground two leather-hard SnapPap surfaces adjoin one another. You can make turning easier by removing the SnapPap from the floorcenter pushes her hands and thereby step by step towards the outer edge of the ground leads. Here is a lot of patience required ...
- The inner basket stay as we sewed it: He continues to point outward / direction with his left side of the fabric observer!
After the turn of the outer basket is done, it can go on:
- Take the food basket in your hand: The right side must Inside be visible!
- Just as it is, sandwich the food basket into the outer basket: when you look in the baskets, you have to see the pretty lining side! The two left Side of the baskets touch each other on the whole surface.
Now is still the possibility to consider where the side seam of the feed basket should "come" - to turn only the feed basket if necessary in the plane ...
- Check again: The right side of the outer basket is now on the outside - the right side of the fabric basket now points towards the inside of the basket - that's the way it should be: From the inside and the outside, only the "nice" sides are visible!
- The handles are now still inside (!!!) of the basket - and this should be so!
- Lay the (yellow) stocking strip lengthwise left to left halfway - it will give it its desired width - the right side of the fabric faces outwards (unfortunately I have no picture of this, but I think that is to get over ...).
- Grasp this stocking strip at the long edges = take it in your hands, "grab" with it inside the basket and the strip with his open Long edges as a third sandwich layer flush on the right Fabric side of the food basket stuck - even over the ends of the handles!
- If you look at this edge of the basket from above, you only see open fabric edges or the four ends of the handles.
Once again to check: From the outside to the inside do we have
a) the outer fabric, further inward
b) the lining material including handles and
c) last = completely inside the yellow trim strip. Put all layers well or hold them with clips.
- Quilt all sandwich layers together on the upper edge of the basket - if necessary, insert a 90 mm needle and increase the stitch length, because there are many layers of fabric and the thick handle ends on top of each other.
- If necessary, trim all seam allowances back together so that the following can be better managed:
- The trimming strip from the inside over the basket edge to right Flip the fabric side (outwards), while the handles are almost as if by magic with "upright"!
- The basket edge is good press - finished!!!
I would be glad if I gave some of you a suggestion for similar projects with this tip - that would be great!
Greetings from sewing machine to sewing machine, because only then one can defy the weather at the time :-( Buy now  SnapPap A3 5 sheets sorted 22,35 ?


