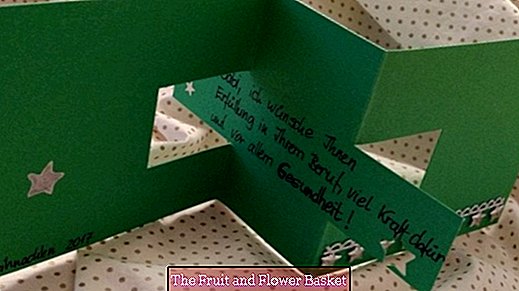
Christmas card - cut open
Maybe this card design comes in time to inspire you to do creative work!
Materials:
- Paper scissors and ruler or
- Cutting mat / rotary cutter for paper
- Patchwork ruler
- cutter
- bonefolder
- Cloth to cover the box when folding (avoid gloss) maybe read again in my tip? Strong papers fold properly?
- Stylefix
- pencil
- punch
- Glitter Pens / Gel Pens in Gold / Silver
- Fotokarton in A4 format (210x297mm)
If you choose the height of exactly half (105 mm), you can cut two cards from a DIN A4 cardboard box - the size of the card depends of course on the size of the texts to be written later, the stamps or decorations to be used, as well as the fact of whether the finished card should fit in a standardized envelope or whether you make one yourself to measure! There are many different instructions on the net :-)
If you have one envelope would like to buy high quality cardboard, then fold the card in width / length according to different or shorter.
Because I wanted to open the card next to a small present, I did not make one.
Here are some hints from my practice:
- As a test case, I tried the position of the incisions on an A4 sheet of copy paper ... because when the card is folded (envelope), it is important that after folding the card the right part covers the left and thus the writing surface (to be described central rectangular area, which is later "unfoldable").
Although similar is also written below the pictures, I would like to point out the following here, so that the beautiful (purchased) cardboard is not corrupted and the card may not be ready in time ...
- Be sure to fold only at the red lines and not fold the writing surface (as it happened to me at first) - so that this is even feasible.
- On the box ... draw in the cut lines, but here not yett cut!
- Because this leaves the box completely flat and you have a good view of the dimensions of the writing surface (part left, middle part and part right), first write down the text - keeping in mind whether on this surface (writing surface) still attached any decorations should be required, which require space.
- Then first cut along the cutting lines.
- Finally, create the mountain and valley folds - for more details see texts below the pictures.
- On the back of the writing surface? Merry Christmas? or write something similar?
- Instead of the by myself (with Stylefix) glued on silver-colored ribbon you can also stamp, draw free hand or - I just remember - by applying a nice fabric application via Vliesofix, cut out of Christmas fabric z. B. a fir tree or a sphere ... images ...
Under the text I signed on the front with my real name but this is not set as a picture.
Step-by-Step Guide
Steps 1-3
This card I will put without envelope next to a small souvenir, so that the recipient can read the same text.
From residual paper, I first made a rough shape and especially tried the distances between the two distinctive folds.
With appropriate dimensions of the card can be made from a DIN A4 cardboard two cards.
Steps 4-6
Sketch for the dimension (all measurements in mm) - the fold lines are highlighted in bold red, because you can not bend the cardboard so easily on it!
Make sure that only in the area of bold red lines drawn kinked? not over the middle rectangular area!
After drawing the cut lines on the cardboard, the text should now be written down before folding / folding.
Steps 7-9
First, it is folded from the front in the left area of the map.
Then turn the card 180 degrees (the back now points to the viewer) and fold accordingly on the opposite half.
In this way, the surface described remains ungeknickt and makes the charm of the card. Then I punched another star.
Steps 10-12
Leave the card with the star hole? fold the provided piece to the left and transfer the star shape with a pencil to the piece of cardboard underneath.
First trace the contour silver-colored with a very thin pencil, then paint flat with a thicker pencil.
The band was actually intended for another project, but proved to be the stars created for this card!
Steps 13-15
Unfortunately, the bar code was still visible on the top left of the high-quality box (I had wisely worked so far that it came to rest on the back).
I tried to conceal this code with stars.
Only when photographing I noticed then that the card is also an equally pretty? Rear? has - I have emphasized this with a small bow.


