Decorative easter eggs hanging on the ribbon
Neighboring children and I wanted to hang up eaten and decorated easter eggs in time for Easter, but do not choose the simple method (wrap ribbon around match, cut this short and "sink" into one of the holes), because I still had many ribbons in different widths and Colors in the craft stock!
Materials:
- blown eggs with two holes
- Bands of all kinds (not too tight!)
- Pull-through aids such as needles u. ä.
- scissors
- possibly pearls
Action:
The principle in all of the methods I have outlined is that the band (like decorative!) Is pulled twice through the egg in each case, then either knotted at the bottom of the egg (thick half) or tied into a loop.
Unfortunately, what you can not see in the photos: You can put on one or more beads at the bottom before knotting them ...
We have tried 3 ways to "carry" a double laid ribbon through the egg:
- With a ca. 25 cm long sog. turning needle, which - as the name says - is used in the tailor area to turn a long, very narrow fabric tube after sewing on the right side of the fabric (eg with spaghetti straps). The ribbon is pulled through the egg in a double layer.
- You can also do one darning needle use it, which must be longer than the height of the egg, so that you can touch it, but then push together with the double-laid tape through the egg.
- Or one uses a special artisan needle, the sack needle, It is so long that it protrudes through each egg and in addition has such a wide eye, so that you can double-thread the ribbon and then pull through the egg.
No matter what technique you try: The closed = pretty end of the ribbon should have no knot, because it is later hung over a branch, where it is very visible. This closed end should like to be on the slender "end" of the egg, so that the egg with its much rounder, wide half to the floor shows. Here, at this thick end, should be the decorative area of the thread with knot or bow.
The photos are arranged in their order in such a way that they reveal in detail the different needles as well as the work steps to be carried out with them.
Step-by-step guide:
Pictures 1-4:
All three used needles from left to right: darning needle, turning needle and sack needle.
The turning needle is long, very thin and slim and fits through even the smallest hole.
The turning needle stands out from the other needles in that it has a point = opening at which the processed material can be split into two sections of about 0.8 cm in length and unfolded. One of the two parts? is just shaped, the other bent like a hook.
In this photo, this hook-end of the Wendenadle is completely closed and reminiscent of the functioning of a carabiner: One part is bent over there, the other smooth end works in that direction and closes the carabiner.
Pictures 5-8:
The needle is now inserted with the divisible end from below (thick) up into the egg and completely through the egg. With the fingers or by gentle shaking you can bring the two divisible ends of the turning needle from each other and the hook is visible. Exactly this hook is pierced into the closed end of the tape and clings to it quasi in it: The tape is now on the hook!
Slowly you pull the reversing needle now backwards, so to yourself. This automatically closes (!!!) the otherwise open end of the turning needle. Its end is so narrow that it can be carefully pulled down through the egg together with the trapped ribbon in it.
The reversing needle has already left the egg inside? and the hook-end works automatically? the ends diverge.
The ribbon is still hanging on the hook. This is done so that you can pull the tape as far as necessary from the egg.
Pictures 9-12:
Finally, loosen the hook end of the needle carefully from the tape and set it aside.
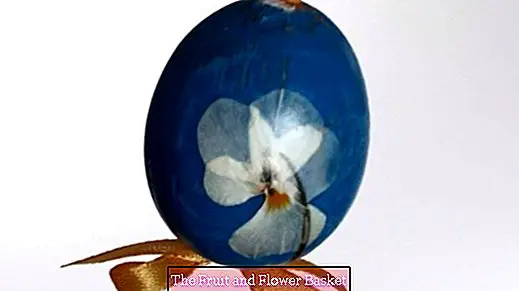
This egg has received a knot.
A branch is already waiting for the Easter jewelry!
If the ribbon is very narrow, you can thread it slightly doubled in a darning needle and push through the egg.
Pictures 13-16:
With thicker ribbons perhaps the stuffing needle is not enough, so you have to reach for a pin needle? she belongs to a so-called craftsman needle set.
It has a suitable for this purpose large wide eye of the needle, through which you can easily thread a wider ribbon.
But if the tape does not pass through the holes of the egg (in double!) Width, the whole threading does not help. This is where the tip of the needle comes into play: With its help, you can push the tape with its closed end from bottom to top in the egg = stuff.
The band has already been transported a little further into the egg.
Pictures 17-20:
It is difficult to feel with the needle tip the opposite hole in the egg?, So push the tape exactly to the opposite hole of the egg. Patience is needed here!
But even this hurdle is after many blind? Poking around in the egg someday! At the lower end, a knot is also set here and the tape ends are left as long as desired or cut short and at an angle.
But if the band is very narrow, you can insert it twice as in sewing the needle eye of the sack needle as well as otherwise.
Then, from bottom to top to the thin end, push the needle with needle eye and thread first through the egg.
Pictures 21-23:
Remove the needle from the belt? we are nearly finished!
For this egg, I've tied a cute bow: A partner holds as a precaution egg and already drawn-through end of the tape, so that it is not accidentally pulled out of the egg when loop binding.
The egg in its full splendor hanging on the branch: Easter can come!
Enjoy reading and a blessed pre-Easter! Best regards!


