Design and sew sun and wind protection
In order to enjoy the sun on our balcony undisturbed by the eyes of curious neighbors and especially protected from the wind, I have designed and sewn a windbreak according to the framing of the balcony. Objective: A windscreen made of opaque and weatherproof material in friendly color and: It must be easy to attach and remove it far above the head.
On the Internet I am under the keyword? Canvas, sunscreen, nylon tarpaulin fabric by the meter, waterproof, tearproof and opaque, outdoor fabric for sewing? quickly made a find and have opted for sun yellow. Before the purchase I made sure with the offerer that the fabric is to be sewed even in several layers with a high-quality sewing machine. The required eyelets are hammered in the required size anyway with a hammer on stone floor? The project should not fail.
In advance: The windbreak could not only be made of a rectangular piece of fabric and attached, because he should extend to the top of the balcony half and then also obliquely and angularly projecting roof extension, so I was forced to the contour at the top accordingly imitate the course of the roof. However, the two vertical and the lower edge of the windscreen should be at right angles to each other and so would be easy to sew.
Below are the steps I unfortunately did not document, because in the beginning I worked on the ladder. I was only able to take these steps when the wind was calm and did not take any additional pictures ...
Design sun and wind protection:
A) Cut a large piece of solid paper roughly and hold it in front of the opening to be covered.
To even have a "checkpoint"? to have, I have screwed in the highest point of the cover of the roof slope a hook, in which by means of eyelets of the windscreen to be hooked later (te). At this point, I have folded the paper several times in layers and ever hooked.
B) After familiarizing myself a bit with the contour of the upper edge, I inserted additional hooks into the roof slope at the corner points.
C) From the first hook on the left, I guided the paper to the right side and kinked roughly according to the later form and even cut off some protruding parts with courage.
D) From the ladder and up again, replaced that day actually belonging to the daily routine training! The paper was then cut to shape on the floor. Then again on the ladder, hang again in the already existing hook and check. In absolute calm, I could roughly bend the paper in the course of the contour? get off the ladder and cut on the ground. The whole thing until the contour was roughly given.
E) Now it was about transferring this contour to the fabric. I have that ? how many years tested with large pieces of fabric? done in the kitchen on the smooth floor, because you can pull the fabric sliding into shape comfortably. He would only have stopped on a carpet. Especially at the multiply curved upper edge I left a lot of material when cutting, so with a large seam allowance? worked. And I already had in mind that here is a well-made? Hem? had to be sewn, because this edge in its full width so hooked in hooks on the roof extension and in strong winds not allowed to tear. Also at the bottom of the piece of fabric I have not exactly cut to length, but also leave a lot of fabric here: cutting can you always? to stick? is bad? Already at the first paper on fabric laying I paid attention to the threadline, whereby I have also on the lateral, vertical edges generous material stand? to be able to sew a comfortable hem here as well.
Sew sun and wind protection:
Image rows from left to right.
Pictures 1-3:
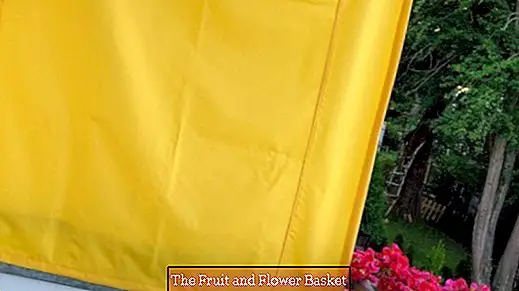
Here you can see the windbreak sewn and hung with three eyelets and a carabiner device: The full width of the balcony is protected from wind and sight.
Ready-made top edge of the windbreak.
At the lower end of the windscreen is anchored on both sides with a narrow color-matched rope to the balcony railing.
?
Pictures 4-6:
For the purpose of fixing it saved me the fact that in the metal bracing of the parapet right and left a hole was drilled through which would then fit through the diameter adjusted rope through!
In order to obtain an edge reinforcing document, which must have the identical, angular shape, I have the fabric in the upper part about 50 cm height doubled and then cut into shape.
Seen from the later right side of the windshield, the fabric layer for the stocking is underneath.
Pictures 7-9:
The up-facing fabric part can be called? Rest? be set aside? the stocking below is clearly visible.
This document is sewn to the outer fabric of the windscreen with normal sewing machine yarn to reinforce it, because here later eyelets must be taken.
Cut the seam allowances in the two corners up to 1 mm to the seam, so that the document can be laid down wonderfully to the other side of the fabric.
Pictures 10-12:
First press the seam allowances apart (!) So that the document can be laid more smoothly around the edge to the other side.
Staple the edge to prepare for subsequent quilting. For this I used Wonder clips that do not punch the material? can and can be used much more conveniently and faster than pins.
These Wonder Clips offer many companies? The well-stocked retailers even offer different lengths / sizes, so you can choose depending on the fabric quality: the longer a clip, the stronger its hold.
Pictures 13-15:
The lower edge of the document is folded into a hem and (unfortunately) put, because Wonder clips hold so only on a fabric edge and not inside a piece of fabric.
Only for stitching I prefer this ornamental and quilted yarn. Despite its strength, it can be very well threaded into an 80s sewing machine needle? just cut the thread diagonally at the top! The big Kone is in relation to the run length in the Internet priced to get cheaper than much smaller in the department store? it is worth the consideration in any case.
To prevent the yarn from unwound from the cone gradually, I always cut a notch in the bottom edge before use and pinch the thread here.
Pictures 16-18:
The already mentioned decorative quilt yarn - from the Kone running? conditionally that the thread is unwound from a much greater height than a normal small spool. That's why I use a spool holder for Konen: Its slightly curved unwinder / arm can be locked in different heights / inclinations and can thus be adjusted to the height of each sewing machine type.
To this spool holder belong two attachments: On the approximately 5 cm high a cone is placed, which then can not jerk back and forth. The thread is so flawless, because smoothly and evenly handled. Only then is an optimal seam guaranteed.
If I also want to switch to normal yarn on a smaller roll in the same project, I also use this spool holder, but put the enclosed round disc with the rounded side down, on top of this spool, then the yarn is unwound here with very little resistance and there can be no thread salad here too.
Pictures 19-21:
The spool holder together with the yarn is placed next to the machine and the metal arm is angled so that the yarn is set at the same height as (in the further course) the corresponding feed into the sewing machine.
In order for the thread to be guided even better, a notch is provided in my machine on the raised handle (which actually serves to transport the machine) through which the thread can additionally be threaded. Let's see if that's possible with you too!
As a bobbin thread, I use my usual 120 gauge yarn from the 200 or 500 meter reel.
Pictures 22-24:
For clean parellel stitching I use the so-called. Kantensteppfuß, where you can set the distance to the edge arbitrarily. Choose the stitch length much larger than usual, so that the thick upper thread has enough leeway and the seam becomes smooth and the stitch more decorative.
Except for exceptions, I always stick across the seam direction, so that the fabric in front of the transporter at long? Stretch? can not wave arbitrarily. Tip: Pull out before reaching a pin.
The almost finished upper edge of the windscreen in the lower part of the picture seen from the left side of the fabric.
Pictures 25-27:
At the top of the picture you can see an elaborated "corner". the windbreak from the left side of the fabric.
Now use pins to mark the points where an eyelet must be taken.
Although the fabric is woven very strong anyway as a outdoor material, I have him as a precaution even reinforced with so-called Wonder Dots. These are finished Vlieseline tiles that are ironed on the fabric to help prevent eyelets from tearing out. especially great application of course with jersey!
Pictures 28-30:
Finished eyelets? seen from the front and back.
In order to fix the blinds also and especially because of the balcony located at an angle above us and the neighbors' curious eyes, I came up with the idea to design this hanging solution for lack of wood above: The rope gets into a snap hook and this one hooked into the gutter by means of an S-hook. Standing on tiptoe I can use this? Apparatus? so just wait!
In order to get the windscreen on the top left = far above head height quickly (!) And without getting a ladder on and off again, I remembered the long pole with which the department store drapes textiles from a high wall.An aluminum pole from the hardware store could be bent accordingly: It is hooked into the eyelet and then inserted high up the eyelet in the hook there!
Sun and summer can come!


