Lacetuch tense: My first experiences
In the following I would like to give some hints to the clamping (m) of a Lacetuches. Previously, I had informed myself on the net about opportunities and materials, but then doing the own experiences, which I would like to pass on here:
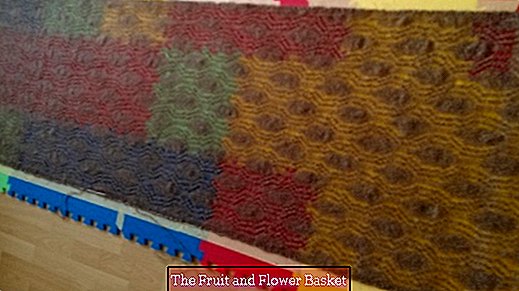
Stretch Lacetuch
- The Tools can be seen in the photos. After weighing everything up, I opted for the tension rods and the so-called T-pins of the company KnitPro, because the advantages seemed plausible to me: The tension rods instead of many pins have the advantage that the edges (if so knitted) in itself represent a straight line and later you only have to pull on one of the two side bars to possibly change the desired width of the cloth. That's exactly what happened with my cloth: After fixing both short sides, the tension was not strong enough for me and I corrected the position of the tension rods with a few simple steps.
- The T-pins are inserted at intervals close to the tension rods in the mat and hold them in place. They are much longer and more stable than regular pins and therefore super easy to use. As mats, I have chosen those that can be used later as a play mat for children and re-use.
- After a 30-minute soaking In a detergent for precious hair (mohair, wool, angora), I rinsed the scarf very carefully, never wrinkling, but only slightly expressed and dried in a large bath towel.
- The real thing Tighten then took place on the nested mats parts. First, I have on the mats to reach the final gauge of the stole means masking tape masked from the hardware store (you have to remember whether the inside or outside edge of the masking tape sets the measure). Likewise I marked the horizontal middle of the stole (neck behind). So I made sure that measured from here both stole ends were the same length. I did not knit the stole as a long scarf, but two identical scarf halves and then in the middle (at the neck) with a special stitch stitch almost invisible (I hope so!) Connected: So you can see no seam, but has in the foresight the worn stole in the pattern identically from bottom to top in the direction of the neck running parallel rhombic lines and in each case a fascinating point, the only by the tensioning to the "appearance"? would come (exactly and only by this pull the tension rod? not by all Randmaschen).
- Second, I have the short Stole ends (here only the later tip) threaded with a tension rod and attached to the mat in accurate width with T-pins. So I had already set the total length of the stole.
- The two followed long sides, where I had to use several differently long tension rods behind each other on one longitudinal edge, because understandably no one was alone 2 m long. I made sure that they were connected when? overlapped a bit and especially here set a T-pin.
- After the stole was completely fastened, I again put a measuring tape across the stole about every 30 cm and controlled the distance of the tension rods. Phew? all correct!
- Now it was only waiting, until the stole was completely dry (like over night).
My experience with my very first Lacetuch
I have adjusted my needle size to the stitch sample given in the instructions. With the next cloth, I will always take less stitches in length and width or knit rows, so that the clamping is even more effective or you can still decide in this process, how strong you finally tense. Certainly, this also depends on the yarn used. Try is about studying!
I wish you a lot of joy and courage (which I needed especially for stretching), to try the lacerickerei!


