Make a hat from a "mesh mix"
The next winter is coming ... Here I show interested people, how to make a hat that you can not buy, but is feasible for all sizes.
Since I had given away all the big hats I've made so far, I have a little, with? Step by step? Explanation worked for the doll, since these steps are the same for all sizes. Do not worry, it reads more complicated than it is. You can also see from the photos how and what is meant.
You need:
- tape measure
- Wool (at will)
- Corresponding crochet and knitting needle size
As measurements one needs only the diameter from ear to ear and the head circumference at the forehead measured (with the doll it is 9 cm diameter and 28 cm head circumference). If you have the two dimensions, it can go already. The cap is started up with a small circle and crocheted first, with increasing rounds, more or less like a doily. There are no limits to the imagination in terms of pattern and mesh. The important thing is that you have the "doily? evenly crocheting and a few centimeters larger than the diameter from ear to ear. That was the first step:
In the second one then take stitches again in one or two rounds until the circumference of the forehead is reached, so that the hood type is created:
In the third step you take the knitting needle back through the crocheted stitches and continue knitting in the rounds until you reach the desired "height". has reached:
In the last step you chain off. I always do this with the crochet hook, which makes the final row more elastic:
The cap is ready:
If you like, you can crochet bows or mouse teeth.
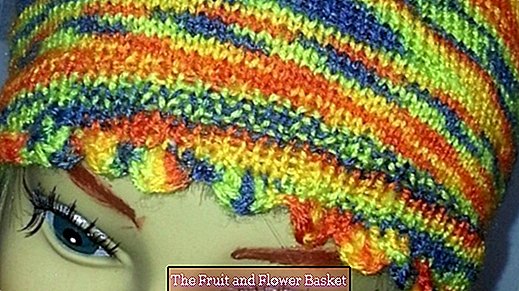
Here you can see the finished hat on the doll:
The following 3 pictures show caps that I made in this way:
The caps on the next pictures were knitted from the same ball. The pattern color gradient changes, depending on whether you start with the thread from the inside or outside of the ball:
In the last picture you can see how the diameter of the head is meant:


