Make simple Christmas window pictures with children
In a quick and easy way, I have tinkered with my 3 1/2 year old son a few Christmas window pictures.
Of course they are not perfect, as he cut and pasted partially alone, but he was very happy to tinker, and then hang the things to the window. Older children can already do more alone.
That's how it works:
- For the Christmas trees you need 3 strips of colored paper (paper or similar, which is just there), a short brown strip of paper and colorful tracing paper for pasting.
- The three colored stripes stick together at the corners, the third lower strip should only be about half as long as the other two. Glue the transparent paper and the stump on the back. Finished.
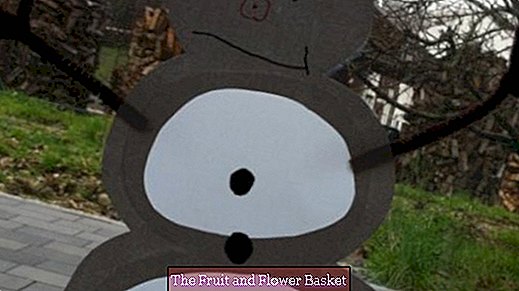
- For the snowman you need white paper, black paper and white tracing paper. For the arms either colorful pipe cleaners or black paper.
- Mark the snowman on the white paper and cut out. Then cut out the middle of the two lower "balls" and glue them back with white tracing paper.
- From black paper the cylinder and the buttons, who also cut out and stick on eyes. Paint the face.
- Turn your pipe cleaners from pipe cleaners and glue them on the back with Tesa. If you do not have pipe cleaners, you can paint your arms on black paper, cut and glue them on.
This tinkering is already suitable for little ones to stick, etc., larger children can paint the things themselves and cut out. It is not a lot of effort and does not need any special stuff.


