Tinker windlight "fairy in the glass"
In the description for the lantern "fairy in the glass", I have used several different terms in some parts, so that finding and finding on the Internet easier!
Materials:
- Jam jar, cucumber jar, mason jar, grooved jar ... If you are looking for a fancy glass, you can quickly go to the internet under "candy jar", "candy jar", "jar with lid", "glass jar" ... to find something. Only when you have the suitable glass in your hands, choose the silhouette to match the glass shape and size, or consider what you want to attach.
- Either create fairies templates / silhouettes yourself or buy ready-made (then googling under? Tattered Lace ?, continue under? Butterfly, Unicorn, Fairy, Elf ?,? Free Fairy Sihouette ?,? Fairy Glass Stickers ?,? Tattoo Black Silhouettes of Fairies? or? fairy silhouette ?. To pause and cut see below ...
- Pencil 2H for pushing through the contours
- Cutting resistant pad
- Scissors, cutters for straight lines and especially curves
- Tweezers for lifting tiny parts and placing them on the glass inner wall
- Photo carton (330g / m2), cardboard (180-220g / m²), construction paper (130g / m².)
- To squeeze the outlines on black / dark cardboard: copy paper, but then the pckg? Yellow and white? or use yellow / white sewing copy paper / copy sheet for fabrics (!)
- Craft Glitter, Glitter Powder, Deco Glitter, Craft Flicker, Glitter Flimmer, Glitter Spray, Glitter Spray or Frosty Spray
- Hologram colors or any other colors of glitter ?!
- Napkin glue Mod Modge / Art Potch (Decoupage_Kleber und Lack), Decopatch glue, Decopatch glitter glue
- Brush, preferably rigid bristles
- Sponge, modeling sponge, sponge, like soft and yielding, because it is great dab and can create a delicate film
- Old glass lid or similar for mixing the ingredients
- stirrers
- Decoration such as bast yarn, artificial plants, flowers u. v. a. m., garlands.
- To attach opulent decorative parts, prepare the heat gun
- Artificial tealight / fairy lights
To carton:
He should not be too strongly be, because the cut silhouette is supposed to be able to cling completely to the roundness of the glass, so that the sticking succeeds better.
I have therefore used cardboard (130g / m2). Since the silhouette (s) get wet when applying glue, long thin pieces may become pliable and threaten to buckle. (so with me the fairy staff). Therefore, when attaching to the inside of the glass, make sure that the silhouettes touch the glass wall in their entirety before the final gentle pressing ...
In the colour I've decided against the almost exclusively used black and dark brown because it's just softer in the outline - maybe the hard black of the silhouettes has kept me from making a fairy glass ...
Brown cardboard has the additional advantage that you can (depending on the grammage) print the silhouettes directly on the cardboard and thus can do without the pause! If you use the printer, you can print the silhouettes exactly as they first appear on the screen. H. they do not have to be printed mirror-inverted - unless the silhouette is reversed and feels better ...
What is? Mod Podge ??
Mod Podge is a "all-rounder" because it is sealant, adhesive and paint in one and still water-based. This way children can tinker with it without danger of health problems. Adhesive-smeared fingers, as well as all parts that have come into contact with the adhesive, such as sponge, spatula ... can be wonderfully cleaned in a water-rinsing solution and many ingredients are used again accordingly!
How to make a fairy glass?
There are several different types of approaches - I will briefly describe the three most commonly used:
- Napkins are applied layer by layer with Mod Podge on the outer surface of the glass and then immediately glitter ... sprinkled on the still moist glue. The napkins already give the fairy glass a slightly opaque touch, and the glitter to be spread is then just another visual highlight.
- Many glitter can be bought in a tin that you use like a salt or pepper shaker. Of course, you can also buy the glitter in a differently packaged form and sprinkle it by hand. Of course, this has its own charm, because then you can perhaps work in more detail in the distribution ... On the glass napkins are not applied, but only the adhesive and then immediately sprinkled the glitter additives by hand. They adhere to the still wet glue.
- The third possibility is to stir (all) glitter additives into the adhesive / here the Mod Podge and apply this mixture to the glass surface. This method is based on my production. If I compare my finished fairy glass with those on the net, the glittering portions did not cover the glass that much - is it all without lighting? already more transparent than most, so that the contours of the silhouettes are already visible by day.I also like this better than most of the fairy lights depicted in the net. The small amount of glitter does not seal the glass so much, but leaves the eye more room to look inside. If you do not like this effect, please add more glitter to the Mod Podge - but I was afraid that the glue would get too thick and I would not be able to dab it up with a sponge. Exactly that was intended, because I did not like the spread of the glue-glitter-mass with a brush (on a sample-glass), because one then "stripes"? has seen...
Instructions for crafting a fairy glass
Google it under the heading VIDEOS? Fairy in the glass? , "Fairy glass crafts", "fairy lanterns"? , Fairy in the glass? or very often also in English under? Fary Jar Night Light? or? Fairy Lantern Jar? or? Fairy Lantern Tutorial ?. The versions in English are often more authentic - you can understand the spoken word under? Settings? Translate into German - that's enough to get an overview, but in any case, great suggestions in terms of actually doing! Or you stop the video at the point where you want to have a super exact translation, copy the displayed English text or write it off briefly and let it z. B. translate with google translator ...
The steps in detail please as always from the picture signatures.
Here are some additional comments:
- Because I wanted to trick artificial snow on the floor after the completion of the glass - before inserting a fairy lights, I attached the silhouettes about 1cm above the base of the glass, so that they are not covered later.
- If the glass is provided with a thick embossed logo, position the silhouette in the further processing on the surface facing away from the logo, so that the view does not fall directly on the logo.
- In order for the glass to be dry, dust and grease free before use, it is important to wash it thoroughly with detergent before use.
- Sand a possibly existing and to be used metal (!) Cover with sandpaper, so that he accepts the glue better.
- Dab outer surface and lid of the tealight one after the other three times with the Mod Podge mixture.
- Keep the remnants of the glue-glitter mixture airtight in an old jam jar (screw cap!) (Mod Podge can be used for about 8 months).
- Attention: The finished outer layer of the fairy glass is not waterproof. If you want to have that, you must apply a clear acrylic sealer after the surface has dried.
- Only after the lantern was completely decorated, I first filled the powder snow and introduced a 10-string of lights. This worked with a button battery, so that I could put it in the tiny container (without annoying feeding cables!) Also into the glass and the lid closed the lantern wonderfully.
In order to be able to turn the lantern comfortably in order to look at it from another side, I put it on a slightly larger shallow crystal bowl before giving it away: Dreaming can begin !!
Step-by-Step Guide
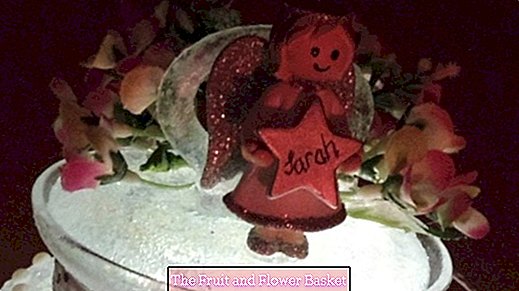
Steps 1-3:
The decorated wind lantern with the guardian angel on the lid and two of the four silhouettes.
I tied two ribbons around the narrow neck of the jar and tied them together to form a bow, where you could pull apart the ribbons in a decorative way.
In order to be clear about the silhouettes to be used, I first printed them on normal printer paper, held them to the glass and then specified the number and size.
Steps 4-6:
Here is an overview of the materials - but then the copy paper was not used because I have used the back of the printed on brown paper black silhouettes.
Powder snow can u. U. also in craft areas of drugstores - especially in the Christmas season - buy.
I hung up the silhouettes on a strip of paper the length of which corresponds to the inner circumference of the glass and then decided to use four silhouettes instead of the three.
Steps 7-9:
Because the silhouettes are not all the same width, I stuck paper remnants in their approximate size on the glass - the moon z. B. is altogether narrower than the fairy staff with its stars. At the same time I have set the sequence / order.
When cutting out a silhouette, be sure to start with the interior areas, because you can almost "hold" yourself with the still outboard. has - so: work from the inside out.
Here you can see very nicely the difference in the hardness of the contour: on the left the black printed silhouettes, on the right the then cut out brown. Because I wanted to use the back of the printed silhouettes, I printed in the final attempt mirrored and then cut out.
Steps 10-12:
Since I needed many stars, I was able to punch some with my mini star punch (size 9mm).
I then drew the smaller one's hand with a sharp pencil on cardboard residues and cut it out with the cutter - the irregularities that made it the charm ...
The smallest stars are just 6 mm in size.
Steps 13-15:
So the starryness looked like after cutting out - luckily I did not have any pets or toddlers anymore, that could have dispelled my star luck in all winds ...
In order to determine the position of the four silhouettes, I measured with a measuring tape inside the glass the circumference (which was actually much lower than outside).
I still had the paper strip (picture 6) - and then I arranged the sample silhouettes out of printer paper. H. Slightly glued while keeping an even distance from each other.
Steps 16-18:
Close the strip to the ring and place it inside the glass. Mark the center of each silhouette on the outside of the glass with a water-soluble OH-pen.
I used this glue, the so-called Mod Podge, to apply the silhouettes on the inside and the glitter layers on the outside, to seal and varnish them.
Now it was up to the Klebeschlacht, which succeed only if all materials are ready for all eventualities. First, the silhouettes are glued inside. So that they adhere well, then repaint completely with Mod Podge. Only in the third step, the marking lines are wiped down the glass edge and then dabbed the glass from the outside.
Steps 19-21:
Although I knew the Mod Podge cures / dries transparently, I got quite a bit scared when I saw (still) whitish glue after applying it!
Here are some of the possible glittering ingredients I put into the Mod Podge and then dabbed with the glue as a "mass" on the glass.
Already like the lubrication of the silhouettes, the Mod Podge starts with a whitish appearance. At first one does not believe that one will be able to look through later on.
Steps 22-24:
But after about 15 minutes the glass inside and outside is in the truest sense of the word? Sure ?: The glue dries absolutely transparent! The red iridescent parts are wonderful to recognize.
When looking closely, one suspects the "glowing" parts of the scattering powder and realizes that in the meantime, the silhouettes are also wonderful to see on the glass inner wall, so can shine through flawless. The fairy staff with its many little stars was worth the effort!
The glass once turned around, so that each silhouette shows the viewer!
Steps 25-27:
Now the lantern should be decorated. Week-long? Collecting? and? hoarding? went ahead and paid off: Only if you have materials to choose from, you are free in creativity.
The lantern still without lighting? photographed by day.
Unfortunately, I had to wait hours until it was evening and I could take more photos: The fairy rests on the snow carpet the same elf? the iridescent glittering parts conjure a great atmosphere.


