Apply bandages and patches correctly
Who does not know that: One has cut in the finger and the darn plaster does not hold. If you want to speed up smaller wounds (with the emphasis on smaller ones) at home, it is helpful to know how to properly apply bandages and patches.
The patch
No issue in even places, but at joints, especially on the hand, there is a liability and sitting problem. Therefore these tricks:
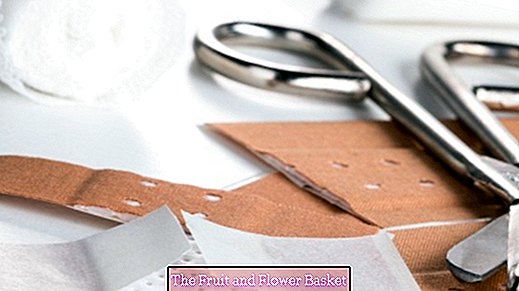
- The plaster must always be big enough? the mull part larger than the wound (of course), but also the adhesive part must provide sufficient adhesion. Although there are a variety of strips in all sorts of forms in the trade, but it is still advisable to have the classic adhesive plaster in the piece in the house. You can cut that into shape and carve it the way you need it.
- The fingertip plaster: cut off a long piece of plaster? at least as long as twice to the first finger joint. Cut a wedge in the center right and left in the adhesive strip. Fix the plaster over the fingertip, the wedges are to the right and left of the dome.
- Plaster between the fingers: cut off a long enough piece of plaster. Make two cuts in the center right and left in the adhesive strip at a distance of one finger's width. These centerpieces then stick to the fingers.
- Plaster directly on the joint: cut two wedges on the right and left in the adhesive strip.
- Slightly longer cuts can be made with a butterfly patch, which is glued perpendicular to the cut.
Buy now  Hansaplast Classic Plaster 2 m x 6 cm, cut-to-size wound plasters by the meter with extra strong Kl? 4,80? 2,95 ?
The association
You will put on a bandage if the wound is larger than a bandage can hold and you are sure that no doctor is needed. For a wound dressing, the following rules apply:
- Know when to call the doctor: in case of significant pain or if the wound is larger than 3cm, there is a major skin loss or deep wounds. If no visible healing process has occurred after 24 hours. Likewise, if the wound festers or is still foreign body in it.
- Never wrap the gauze bandage directly on an open wound, which can cause serious problems with weight loss. A gauze bandage is always only for fixing the? Actual? Association there: the sterile compress, the cheesecloth or the like.
- Clean wounds before connecting. Either with clear water or with a suitable disinfectant. Never use a hand disinfectant!
- Put the compress on the wound and start with the gauze bandage underneath the wound and wrap it upwards. Always cover half of the course until you reach above the wound.
- Close with suitable clips or tape. Gauze bandages can also be closed by tearing the end of the bandage lengthwise in half in the middle, thus making a knot around the bandage.
- Do not connect too tight. If it pushes (and it should not be a pressure bandage), it is too tight!
- The association regularly? at least every day? switch.
- If you need a compression bandage (because you have to go to the doctor immediately and the car does not want to bleed completely), put a very thick gauze pad on the wound and wrap it very tight. And then tatütata!
- With a triangular scarf you can connect hands and feet as a whole. To do this, place your hand on the cloth, fold the tip over your fingers and place the two corners over from the right and left. Wrap this once around the joint and knot it at the front.
- If you need a bandage around a finger, first place the gauze bandage around the base of the finger, cross over it and bring it up to the fingertip and down the back. Hold on and once again up and from there down the finger down.
Recommendations for the medicine cabinet
- Wound disinfectant
- Sterile compresses and cheesecloths
- Mullbinden
- Elastic bandages
- Tape / tape
- Sticking plaster? either in different forms or in one piece
- Sharp, not too big scissors.


