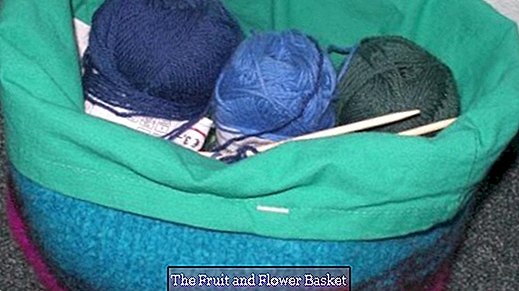
Handmade basket made of felt wool
Felt wool is special untreated virgin wool, which is first entangled with thick needles and then felted in the washing machine. There must be felt wool on it, otherwise it will not work. The piece of knitting is about 30% when felting. I chose something as the first piece of felt with felt wool, where it does not depend on the exact dimensions: a bag that became a handmade basket after felting.
Step 1: Knitting
- Cast on 42 stitches with a circular needle size 8-10.
- The ground of the basket make 8 ribs on the right (= 16 rows, back and forth rows knit right) in blue.
- After the ground will be Knitted in rounds on the right, Add stitches around the bottom, from the edge stitches and the stitching. (= 100 meshes)
- 4 rounds to the right in base color and then 4 rounds in another rainbow color.
- During the color change, I have the wool thread of both colors the last or the first 20 centimeters turned up against the spinning direction, have the threads cut in half and rotated together again in the spinning direction. Then I had 20 cm two-colored thread and did not need to sew anything at the end.
- After the rainbow continue to knit in the base color until the desired height is almost reached.
- Possibly. 5 cm before decanting 8 holes knit in order to be able to attach a band or handles later. Knit 2 stitches in a row 8 times and make 1 turn. In the next row, knit the envelope to the right.
- Continue to the desired height and loosen cast off, (Picture 2)
Step 2: Felting
Wash the bag together with 2 tennis balls and regular color washing powder at 40 degrees in the washing machine. Normal program, no short program, do not use softener. I only had one tennis ball and instead of the second ball I took a massage ball (picture 3).
Step 3: Shapes
After washing, pull the bag still wet in shape. For example, insert a plastic box and fix it with skewers. Allow to dry in stretched condition. (Photo 4)
On pictures 6-8 you can see how the wool felted and shrunk. It has become much firmer and more stable. Before felting, it was a bag, then a sturdy basket that you can put down. By repeated washing you can reinforce the felt effect. By stretching in the wet state reduce the degree of shrinkage. The felt but you can not get away.
Step 4: Feeding
As food, I took a cotton bag from the drugstore. The handles cut through in the middle. Insert the bag with the left side out into the felt bag and pass the cut handles from the outside through the holes. On each side two ends of the handles knotted together.
Beat the edge of the bag over the edge of the felt basket. The knots lie between the lining and the bag and are not visible (Figure 9). The felt basket does not have any handles now, but it does not necessarily need it either. If I want to use it as a bag with handles at some point, then I can still attach some. (Photo 9)
Beat the edge of the bag over the edge of the felt basket. The knots lie between the lining and the bag and are not visible (Figure 9). The felt basket does not have any handles now, but it does not necessarily need it either. If I want to use it as a bag with handles at some point, then I can still attach some.


