Shell casket - make treasure chest yourself
This shell casket - treasure chest not only looks beautiful, the manufacture also calms the nerves. At least mine.
That's what you need
- 1 wooden box / casket / cigar box
- beautiful shells and snail shells
- Marble flour fine for 10.29?
- acrylic binder
- and a lot of patience
Step by step guide
Step 1: Preserve shells and snail shells
Pre-sort shells by color and possibly by shape (see photos). It is ideal if you have more than one type and size, which later looks more harmonious.
Each page tests the picture you have in mind, sometimes in dry training and puts it in front of you.
Step 2: Create texture paste
Then it can start to mix the structure paste. These and the acrylic binder you get in the craft shop or even nowadays online z. B. at Amazon.
Always stir just as much fresh as you can process right away. The material is expensive and can not be picked up mixed!
You can always quickly mix new ones in a small plastic container.
For this you take now about 2 - 3 tablespoons from the marble flour and gradually mixed with a little acrylic binder, so that a nice rather thick paste is created.
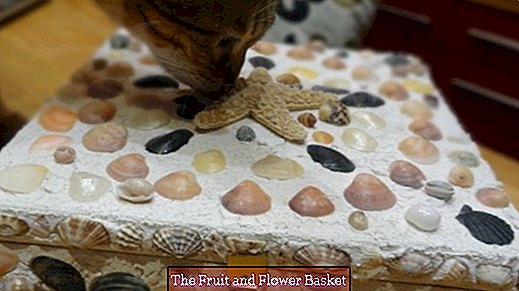
Step 3: Make a box or treasure chest
- You start at the bottom if you use a wooden box with a lid.
- First you do the front side: Apply the paste rather thinly with a flexible trowel, but so much that the shells stick and do not immediately disappear in the mass.
- Glue the pattern you want with the shells and snails.
- The corners and edges can be smoothed with targeted processing (difficult to describe like! Similar to a cake, if you pass the glaze)!
- If you take care at work and do not arrive at the already finished wet side, you can decorate the page next to it in the same way.
- Otherwise, you let them dry for a day and then continue, that's safer.
- When the bottom part is finished, let everything dry for 1 day.
- At the end you make the lid, as already described.
If your wooden box also has a clasp, as shown in my photo, you just apply so much putty all around that you can not see the wood underneath.
So far so good!
Let the lid open dry for a few days.
Then maybe put a nice cloth in the shell box and you can fill it with your special treasures.
It's also a very nice idea to work with children to improve motor skills, or just to have fun!


