Stencil with Freezer Paper
materials
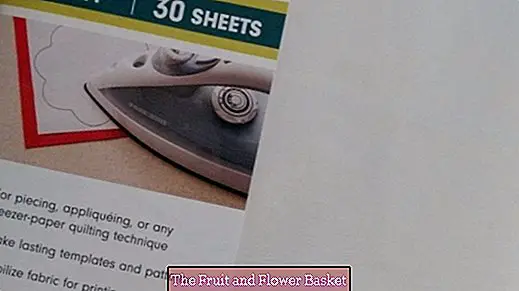
- Freezer paper
- printer
- Iron
- Stupfpinsel / stencil brush
- Stenciling paint / fabric paint
- Tweezers / scalpel / cutting knife (I used one with a fixed blade and a so-called. curve knife for the rounded areas: The blade is cushioned when cutting and can be guided, as if by itself the curves along - simply awesome. Since my stenciled letters were very small anyway and the round areas were even tinier, was this acquisition ever worthwhile?)
- Ruler, if possible: gummed on the back (slipping is prevented)
- cutting mat
Stenciling with Freezer Paper - that's how it works
In advance: In the network you will find a lot of instructions / videos on the topic? Stenciling? also under the term? stencil? (English template). That's why I do not want to deepen this here, but only share my personal experiences - these can often be enlightening because they stem from the direct use of materials and tools ...
Freezer Paper is used here as Mask Material It is a paper that looks on one side, like ordinary writing paper and on the other side paper-thin coated. On the rough side, the desired motif is printed or recorded. Please pay attention when inserting paper into the slot of your own (!) Printer, that exactly this rough side has to be printed! Unlike using transfer paper to print on fabric, do not set mirror print! After printing we cut out the motif and the template is done! Then the freezer paper is ironed with the non-printed = coated = shiny side without steam on the fabric and sticks there !!! Now you can apply the paint, let it dry and peel off the freezer paper: voila - the? Pressure? is finished and the motive is in full beauty in front of you! This way of dabbing the cut surfaces with paint is called? Positive? stencil. In contrast, if you place the cut surfaces themselves on the fabric, iron them there and then apply paint around them (!), You will get a negative image. So you can use the Freezer Paper as a template in two ways!
- Now back to the Freezer Paper: The advantage of this material over stencils made of cardboard or foils z. For example, it is that no drop of color can flow under the stencil and leave ugly stains there.
- Freezer Paper can be purchased by the meter as roll stock or in pack as A4 sheets. Although it is relatively expensive and you can make it from normal paper and plastic wrap itself (instructions on the net), but the latter has not convinced me in the handling but then so?
- Freezer Paper can be used several times!
- Fortunately, the freezer paper was also excellent on my fabric, although it was not "smooth"? (because it is tightly woven), but as a decorative fabric has a significantly thick thread and a corresponding structure (here other template materials would react even worse ...
Can the stenciled surface be easily back-ironed with fleece?
My (anxious) question was whether the stenciled surfaces keep their color structure, if I then z. B. Decovil I iron on the back, because the project requires it. So test this in any case before - and JAAAA - it worked wonderfully!
How many words in which font, size and how to place?
My project was about stenciling five individual words on fabric, not to dye a large-scale motif.
- When selecting the font, consider in advance whether, after cutting out a motif / letter, all the surfaces to be colored are connected to each other and virtually form a unit when lifted off the base. In the literature here by? Bridges? spoken. But if just such "bridges"? in a form / figure are not present, the stenciling is a bit more difficult, as I had to experience suffering. See below for details?inland areas?.
- Print desired words in selected size and font on paper - cut roughly - place / arrange on exactly (!) Cut fabric surface - look at approx. 2 m from the table and if necessary the arrangement and / or size of the words on the object (here the cover of a bookbox to be sewn) correct?
- If all is right: Place the words on an A4 page (or even A5) on the calculator so that there is enough paper left around every word to protect the fabric from the stenciling color after printing on Freezer Paper. Printing on copy paper in the next step means printing on (relatively expensive) Freezer Paper!
Because I wanted to avoid several attempts at printing on the Freezer Paper, I inserted every word into a text field in my text document.So I could place all the words on my A4 page on the computer by moving the text box so freely that afterwards with each letter around Freezer Paper to protect the fabric from the color was present. Anyone who believes this to be on the computer or is fit in any case can perhaps accept the following suggestion: In some text fields, I also have the "paragraph direction? (Menu bar? Format?) Changed, d. H. the words were then printed vertically (see picture). Normally you could have rotated the text box as you like, but this time it did not work out for unexplainable reasons ...
Cut out words - note bridges and internal surfaces
For small motifs: Cut from the inside to the outside, so first cut the inside (out) surfaces, then slowly forward to the outside? In fact, if you started out on the edges, would the inner parts have lost their grip and slipping forever?
Now to the? Binnenflächen?
All letters are yes for stenciling along in their outline, d. H. cut each black line / edge: what has been printed black on the letter, will later be stenciled / painted (in my project) BROWN. But beware: All white = free spaces within many letters may not receive any color, so they must be covered before the actual stenciling. These areas I call here times of understanding because? Inland areas? - such. B. the middle of the letter? O? or parts of the letters? A ?,? R? or? B ?. With this type of letter, you should put the previously cut out small inner surface (Freezer Paper) back into the letter directly before applying the paint and also iron it firmly on the fabric. When placing these often tiny inner surfaces tweezers performs very well.
During the cut-out process, I used the tweezers to place the often tiny inner surfaces of my letters separately in a small bag so that they would not be blown away by mistake or slipped off the work surface. Of course you can do without the cutting and re-ironing of the interior surfaces, then the motif is very compactly filled with color - as you like it!
Who right from the start a writing absolutely without these? Binnenflächen? would you like to google under? stencil fonts? or? stencil fonts ?.
Which color in which quality?
First of all: The net offers colors in various qualities. I have my? Color quality selected by much research that the color is suitable for stenciling at all, so is pretty viscous. I also wanted to use a hue that comes close to the adjacent processed SnapPap. So I once again used my monitor, greatly increased the color shown on the Internet, my SnapPap held next to it and compared - worked as always brilliant, so that the color agreed!
Only when I had the color in my hands, I noticed that it was also water-soluble, so that you could dilute it or mix with other colors - a good thing, I think.
The water solubility also meant that I could clean the brush immediately after use without trace under running water and could do without an extra brush cleaner.
Please remember: stir the color shortly before use.
To protect the underlying fabric / work surface, I cut an A4-size film and placed it under the fabric.
Which brush - how much color?
On a specimen, explore what kind of brush you can handle better. In the end, I used a medium-sized stucco brush, with which one pokes, so - as the name implies - from above, almost from the air, the paint is applied vertically to the surface to be colored. Please do not use the smooth brush surface anywhere above the letter pushing or pulling, so that the often tiny inner surfaces can not move when applying paint, but lie in their place? stay. For one letter, this adversity happened to me, despite all caution, but at the latest, one recognizes the manual work that each of us can be proud of! With a flat Stencil brush I would not have been able to work so carefully with such small areas, because with this yes paint stroking applied - so just test the object.
Also try out how much color / how full? the color should be applied - if necessary, work in several layers of paint.
Prepare fabric
In case of water-soluble paint wash the fabric in any case and iron thoroughly / as desired. The fabric should be free of finish and softener. When applying a color of the quality described above then the substance can no longer shrink. Ironing, because the paint job on a flat surface just gets smoother.
Determine position of each word on the fabric
My words should indeed be applied to a sand-colored decorative fabric, which is completed at the top of a 2.5 cm wide yellow fabric and sewn to the below a 4-cm strip of dark brown SnapPaps.So I have both edges? (Yellow top - Brown bottom) as a strip just times up / down in finished width (!) To the decoration fabric just so that I could get a better overall impression: The words should not be too close to the edges printed on top and bottom , a significantly different inclination to each other and also still have an approximately equal distance from each other - even at the later side seam?
Remove the freezer paper again
In just one article on the net, I've even commented on it: remove soon after the paint job ... That seemed to me then problematic. Therefore, I let the inked areas dry until they are no longer shining from the side, and do meanwhile homework ... At least I did not have to worry about me pulling the Freezer paper dried) color blurred.
- For letters without internal surfaces, it is absolutely unproblematic to subtract the freezer paper from any edge.
- Tricky it is already z. For example, in the case of "N", in which a non-dabbed area (white in print) protrudes into the letters at the top and bottom. Here I have consistently deducted the paper from just this ("free") side towards the middle of the letter - sometimes a piece from below, then from above, then from below again? alternately until the Freezer Paper was completely detached from the fabric. So I avoided that possibly color residues were still smeared.
- Now to the letters, which have an empty surface in the interior, which protrudes from the contour into the interior. B. Like the? G ?. Here I carefully pulled the paper from this "empty", open area (right edge) to the left (please look at the corresponding picture).
- The best way to remove self-contained small internal surfaces is to use the tip of the cutting knife or a thread separator to go underneath the freezer paper from the widest side, lift it up and remove it completely with tweezers. For all just described please necessarily look at the picture with the detailed graphics.
Further processing of the finished stenciled surfaces
After peeling off the Freezer paper, I have the words or the ink order as a precaution to let dry again intensively, before I the surfaces again from the right and left side of the fabric under baking paper 3 minutes at 'cotton? ironed. Please pay attention to the instructions for the color used in each case? If you want to have the textile ready for washing, you have to treat it now to keep the color even after washing - I was exempted from this? Please read about this in the network, eg. B. under?
And what else can Freezer Paper do?
Since Freezer Paper can be wonderfully ironed on cloth and liable there, you can do exactly the same, if you want to print fabric in the in-house printer: The back-ironed fabric is so tight that he pulled from the printer without any problems and so with self-created motif / Texts ... is printed - of course, in a color printer also colored! This method is suitable for the production of individual labels, descriptions for the back of quilts or as an application motif for other textiles!
So, I hope to have inspired some, to venture on new terrain!
Greetings and a good start to the fall, which has probably caught us all ...


