Crochet two-colored spirals - felted potholders
Real eye-catchers are two-tone spirals. Whether tone on tone or in contrasting colors - one is almost hypnotized. You can make round cushion covers, patchwork bedspreads or here a small work from remnants of felt wool: felted potholders.
You only need a little basic knowledge in crocheting: air mesh, fixed stitches, Kettmaschen.
The potholders I crocheted in felt wool in needle size 10 (there were wool residues that were already once entangled and separated again, so they look thinner than 10th strength). You can crochet the spirals in any wool size.
The basic principle of crocheting in spirals
One knits every round in two colors, i. A half round in color 1, the other half round in color 2, goes over without mesh in the next round and takes in each half round 3 stitches, or in each round 6 stitches. When changing color, do not continue to crochet with the same loop, but rest the stitch (pass a safety pin or a different colored wool thread through the loop of the last stitch of a color) and continue with it later. This sounds complicated, but perhaps is vivid through the pictures.
Instructions in 8 steps
Step 1: How to start?
You start in the middle of the spiral with 2 air meshes in orange (color 1, picture 1/1)
Step 2:
In the 1st orange-colored air stitch, work first 3 orange-colored stitches (= first half round orange) and lay down the orange thread (pass a safety pin or a different colored wool thread through the loop of the third fixed stitch) (Fig.
Step 3:
Then work a 1 sliver in red (color 2) into the 1st orange air mesh (image 1/3).
Step 4:
Work 3 strong stitches with red thread into the 1st orange air mesh (= first half round in red) (picture 1/4).
This completes the inner ring consisting of 3 fixed stitches in each color.
Step 5:
Continue with red: work in each of the 3 solid orange stitches of the inner ring in each case 2 red stitches (stitches 4 - 9 in red = second half round in red) and lay the thread at the end (see above) ( Picture 2/1).
Step 6:
Then pick up the orange thread again and crochet 2 sets of stitches into each of the three red stitches of the inner ring (stitches 4 - 9 in orange = second half round in orange).
So far, you crocheted with each color 9 fixed stitches, which are provided in Figure 3 with numbers, which corresponds to two half rounds per color.
Crochet with the orange thread and crochet in the 4th - 9th stitches, the second half round in red 9 more tight stitches, so crochet alternately 1 or 2 stitches in 1 round stitch of the preliminary round (= third half round in Orange) and stop the orange thread (Fig. 2/2).
Step 7:
Pick up the red thread again and crochet 9 more sts in the 4th - 9th stitches in orange, so crochet 1 or 2 sts in 1 single crochet of the preliminary round (= third half round in red) (picture 2 / 3).
Crochet with red thread and then only in each 3rd fixed stitch of the orange preliminary round take a tight stitch (= fourth half round in red).
Step 8:
Pick up the orange thread and crochet the fourth and fifth half rounds, increasing 3 stitches per half round. The spirals begin to assume a hexagonal shape through the increases (Fig. 2/4).
Hexagonal or round spirals?
If you want the final result to be a round spiral, you have to distribute the increments of 3 fixed stitches per half round irregularly. Is the hexagon shape desired, z. B. for patchwork blankets then always increase in the same place.
Completion of the potholder in felt wool
Continue in spirals, continue to increase 3 stitches in each half round until the desired size is achieved and finish each color with two warp stitches.
The next picture shows the potholders from the front and back still unfilled
If necessary, at the end of an air-mesh ring, which is reinforced in the following round with Kettmaschen or fixed stitches, work to hang the pot holder. Sew on threads.
So that the pot holder really protects the hands from hot pots, it has to be crocheted very tightly or even thicker by felting. Normally you should give pieces for felting separately with two tennis balls in a wash. Since I did not want to run an entire washing machine because of a potholder, I simply put the cloth in a normal 30-degree wash and then in the dryer at cotton temperature. The orange-red pot holder was felted first.
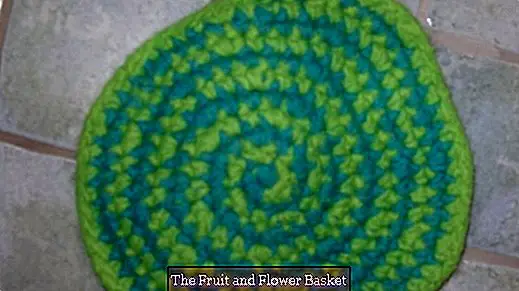
In the following picture you can see the size difference by felting compared to the green-blue pot holder
Have fun reworking and do not let your crochet hypnotize you so much that you can not stop!


