Framing eggs with acrylic paint
materials
- brush
- acrylic paint
- water glass
- Mixing pallet or small bowl
- masking tape
- in eggs with two holes, the box with a skewer for drawing circles
- Laying area for painted eggs (here my foam and toothpick)
- pencil
- Kitchen towel paper
- Newspaper for covering the work surface
- Storage for the just painted eggs
- Paint pens in the colors used
Design eggs - that's how it works
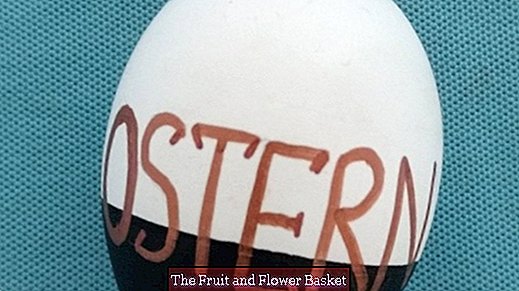
Also with this project I wanted to provide each egg with two different sides. As colors I chose only acrylic paint in copper and black. White automatically results from spanning surfaces altogether.
Plan and prepare
- To work as economically as possible, i. As little as possible to re-apply the brush per color and to wash out accordingly, I first made a sketch on paper with the appropriate surface design and tried to pay attention to the following despite the preference for a particular pattern: as many as possible two surfaces of the same color as the front The back of the egg should like to bump together: So I could mask the egg around and paint both halves in one operation with the same color.
- Before distributing (here) the black, white and copper colors on the egg surface, pay attention to which end of the egg as you develop the? Design? optically to point down or with what end you want to hang it later on a branch.
- If part of the area should appear white then use only white eggs.
Masking the surfaces
- If only a part of the egg surface should be painted with acrylic paint, the edges of the egg should be covered with painter crepe. If the contour is very close to a pole, so it is very curved, do not stick the painter crepe in one piece, because it is very bulky, but from the middle of the line, apply a masking tape to both sides of the surface? so you can make the curvature better.
- All my eggs had only one hole from the blow out? so I could not use the cardboard-turning aid to draw circles. However, in order to preserve exactly demarcated areas, I have used the free Jajo stencils, which are used in the very ornate decorating of particularly Sorbian eggs. They make it possible, at any point, i. Draw a perfectly running circular line at any height. Rubber bands would indeed only on the? Equator line? hold.
- Before the actual painting again decide whether the surface must be painted above or below the masking tape: Only in this direction, so the painter's crepe has been pressed very accurately. On my very first Anmal attempt, I promptly painted the wrong area: The painter's crepe had not been pressed close enough to the egg surface, so that on the one hand, the paint has partially run under the tape? So the contour has not become immaculate? and beyond the planned design of the egg surface had to be over the pile. Therefore, the tip: The (checked!) To be painted surface lightly penciled or hatched.
- Painter's tape can be easily glued over dried acrylic paint and removed without leaving any residue! This is great because adjacent surfaces must also be masked with masking tape.
- But CAUTION when removing the painter's crepes: The paint on the egg is dried, but a big problem is the painter's crepe. Because this is partially smeared with acrylic paint, color may get to the fingers and from there to the still white surfaces of the egg.
Working with acrylic paints
- Acrylic paints are water-soluble and miscible with each other? harden but waterproof!
- Because acrylic paints dry quickly, work quickly? if necessary, apply another after drying one layer.
- Apply acrylic paint relatively thinly? the color does not have to cover 100%? it's better to go over it a second time, otherwise the job may get streaked because the color is much firmer than, say, Colors from the inkbox.
- If you need to use only a little of the acrylic paint for a surface, the unused paint can dry easily and is initially lost for further work. Then you can manage if the acrylic paint has a screw cap with a small covered opening to flow out of the paint: you unscrew the whole closure and takes off with the brush from the upstanding inner edge of the cap only as much and often color as needed and transfer it to the egg.
- In the meantime, if after the first coat of paint there is still paint in the bowl needed for the second coat of paint, I covered the bowl airtight with aluminum foil so that the paint does not dry so quickly and you can still use it in any case.
Painting the eggs
- Choose brush type (flat or round brush) according to the type of application. For larger surfaces, I worked with a flat brush.If you want to apply individual points later, then do that with a very fine round brush or? with black and very fine details for example? also take a Edding to hand.
- Do not leave the brush (s) in the water after use, but wash immediately in water and let it dry lying down.
- Surfaces of the same color? also and especially on several eggs? done in one operation, so you only once a field of the mixing palette / bowl to fill with paint (sparingly) and in between does not need to wash the brush.
- If you want to paint two adjoining surfaces with different colors, then choose as the second color those whose application can later be covered with an edding in the other color: If the contour of the second ink application does not fell after removing the masking tape or is unclean, then you can carefully fill in with a paint pen of the second color possible gaps or with the first color where the second color in the first? retouching.
- When parking several eggs, label them? - I have written on the toothpick of the corresponding holder a letter, so that when you take in hand immediately know what egg with which design it is and what surface must be painted as further.
So, I hope, I have brought you a little to the taste with this technique!
Please ask anytime and anytime for anything described above!
Greetings - see you next time!
Editor's tip: With the acrylic colors of Reeves in metallic look, your Easter eggs will be an eye-catcher!


