Knit sneaker socks: start with the heel
If you want to try a new heel while sock knitting, you can take it here. While the traditional "skullcap heel"? Seams on the sole of the foot that can irritate sensitive feet, this heel has only side seams (inside and outside the ankle).
Many knit enthusiasts do not dare approach socks because they have difficulty with the heel. In another tip I have already explained to you a way how to knit socks without a complicated heel. The heel shape I'm describing is not quite as simple as the one described, but certainly not as heavy as the skullcap.
The instruction was the leather soles for my slippers, but is also found on the net. Unfortunately, the associated photos showed only the beautiful cable pattern, but not the interesting heel. According to the instructions, I did not make any slipper shoes, but sneakers-socks, ie socks without cuffs.
Material:
Wool: 2 skeins of sock yarn, doubly taken, (sorry, I do not know any details, it was ruffled wool without original label, gift from a dear colleague). The finished Sneakers socks, size 39, weigh 55 g.
Knitting needles: Needle game, preferably made of wood (see other tip), No. 5.
crochet hook: No between 3 and 5.
You start the socks on the heel (back sole) with a stitch of 8 stitches. (Picture 1, the beginning is marked with a red arrow)
Spread the 8 stitches on 4 needles (this is really fiddly, here the wooden pins prove themselves).
- First round you knit one round on the right (the round starts on the left side seam).
- In the second round, take 4 stitches, 1 stitch at a time, by knitting a stitch from the thread between two stitches. (= 12 stitches).
- In the third round you take two stitches at the two side seams, after the first stitch of the 1st and 3rd needle and before the last stitch of the 2nd and 4th needle. (16 stitches) These marks are best marked with a different colored wool thread, for the following increases).
- The increases are repeated 7 times in each second round (= 44 stitches).
- Knit another 5 rounds with these 44 stitches, spread across 4 needles with 11 stitches.
This is the heel done. The knitting looks like a small cap in which you can put the heel in. (Picture 3, increases marked with brown thread).
To make it a stocking, you have to do that entrance hole knit. To ...
- On the 6th round with 44 stitches, knit the first two needles (= 22 stitches), knit 9 stitches on the 3rd needle, then cast off 9 stitches, cast off 9 stitches on the 4th needle, then cast off 2 stitches on the right knit. (Picture 4: the remaining stitches of needle 3 and 4 are on one needle) [sidenote: If you do not want to knit socks with cuffs, you do not have to bind them, you have to knit these 18 stitches with a thread in a different color. Instead of knitting, knit another row with the auxiliary thread. When the sock is knitted to the top, cut this thread and knit the cuff with the collected stitches on both sides.]
- On the next round, knit the first two needles as normal, and on the 3rd and 4th needle, cast on 20 stitches instead of the 18 stitched stitches. I crocheted a 20-mesh loop of air instead. (Picture 5 and 6)
- In the next round, I inserted the crochet hook into each air mesh, fetched the thread and thus had 20 stitches to knit on the crochet hook. (= 46 stitches total) (Picture 7, 8 here you can see well that I knitted with double thread).
- Make these 20 new stitches + 4 remaining stitches on the 3rd and 4th needle the back of the foot and according to the instructions, they can be knit in the cable pattern, or smooth right, or whatever you want. 1st and 2nd needle with 11 stitches each form the sole of the stocking. After a few laps you can see the sock shape more clearly (Picture 9)
- With these 46 stitches you knit to the top. To know when to start with the top, I try the socks over and over again and start with the top, if only the toes look out when trying on. That was the case after 32 laps.
- For the top at the side seams (beginning of the 1st and 3rd needle, end of the 2nd and 4th needle) in Take 1 stitch each round (knit two stitches) until only 16 stitches are left. So 7 times in each round 4 stitches decrease in the 6th ..
- Lay the knitting flat on top of each other, so that the first and fourth needles lie on top of each other, as well as the second and third needle. Take these 16 stitches on one needle, alternately one stitch of the first and fourth needle and then the second and third needle alternately. Bind off the stitches arranged in this way. This gives you a "straight sock tip". (Picture 10)
- Crochet loophole loosely with sturdy stitches and sew on threads.
- Knit the second sock in the same way.
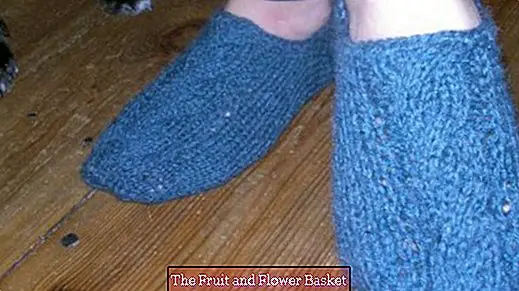
The finished socks have no seam on the sole of the foot and are very comfortable. I wear them as bed socks when needed.