Christmas tree made of paper rolls
In the apartment door decoration I described below at Christmas time, I was inspired by a picture in a promotional leaflet of a retail specialist shop: It should be a Christmas tree made of many rolls of gift paper (but only sections!) Different width.
First a comment to the photos: Have the photos (except for the last) already set, so you may still have the chance to rework! The gaaaanzan finished Christmas tree is hung outside only on Saturday before the first Advent: It lacks the star above the first role, which I will attach in the course of attaching the Christmas tree on the front door ...
materials
- paper scissors
- Scotch tape
- Folding rule, tape measure
- Several rolls of wrapping paper (Christmas or ...), of which only about 30 cm unwound - like also repeating colors / motifs ...
- Decorative band for connecting the rolls to each other (jute ribbon, ribbon, also fishing line ...)
- Decorating decorative items for the finished Christmas tree
method
- First take the height and lower width of the finished decoration (if you have a door, pay attention to the latch).
- Then cut a piece of parcel paper from the roll so that it corresponds to the dimensions. Keep in mind that perhaps at the top of the Christmas tree there is still ... cm space for a decorative lace. Put this piece of paper on the floor.
- Place the available wrapping paper rolls on the paper.
- It is about the color desired overall impression, which can be determined only at a clear distance. On the other hand, you now have to decide how many roles you want to order among each other - that depends on the overall height of the "Christmas tree"? from and on, whether and which decorative material you want to hang later on the roles, so that the distance may then have to be a little bigger ...
- If space allows it, leave this design for a day and occasionally move it as it passes by or exchange it for other paper rolls ...
- If everything is as desired - number, spacing and color sequence of the rolls - then cut off a piece from each roll (as if you want to wrap a present with it). I have always chosen this for about 30 cm: This is such a large piece that you can later / continue to use ...
- Now determine the width of the bottom roll and shorten the already cut roll piece in width. First of all, I kept the ends cut off: because they curl up so nicely, maybe they can still be used later? You will come up with something!
- Place this trimmed roll on the floor in front of you.
- Then cut the top piece of wrapping paper in width ... I chose this part second, so you have a clue as to how broad all the roles hanging in between must be.
- If necessary, reinforce the top roll with a piece of toilet roll, so that a ribbon can be attached for hanging, without later crumpling this narrow piece of paper, if all rolls and the decorative items are hanging from it!
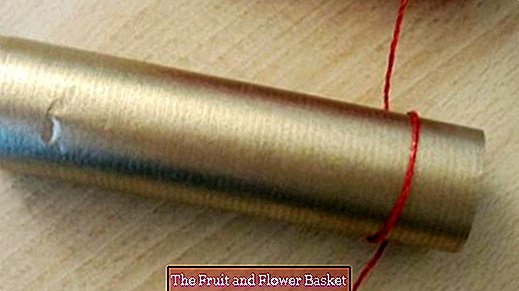
- Now comes the most technically difficult: Connect the reels to the Christmas tree. In my illustration, the rollers are connected with a single thread, which reaches around each roller in the middle. Since this seemed too unstable and I wanted to attach later Deko article and every role would have to balance terribly, I have attached to the top role right and left first a very long decorative band, which later include all the roles in turn down and can connect with each other.
- In order to be able to continue working on the back, neck and shoulder area, I attached the topmost roll to a door with a suction hook in a comfortable working height. The growing down? I have moved fir tree in the course by suction hook always upwards ...
- Now put a big loop on the right and left in the threads coming from the topmost roll.
- Then slide the next lower roll into these two loops and move horizontally and vertically as you like ...
- Continue to work downwards until all roles are at least right and left in a loop ... puhhhhh ...
- Possibly. with the measuring tape ... check the total height and then fix the bottom roll with a tight knot in the ribbon.
- Then about 3 m from the "Christmas tree"? step away and let the overall impression to yourself: Now is still time to hang the roles skewed ... by carefully moving them by moving the loop in height. When all the rolls are fine, pull the thread tightly on all loops on the right and left.
- The final phase, which is only relaxing then, consists of very individual decoration - the Christmas markets or the Christmas carton of Keller and Boden will definitely make you happy ...
- And finally: Make a proud photo for TheFruitAndFlowerBasket and please stop!
- For bachelors / sons: this Christmas tree made of newsprint? Dranhängen CDs?
- When hanging on an apartment door release the spy ...


