Sew narrow seam without plugging
On a purchased scarf I have seen that this was not framed by overlock, but with a narrow sewing machine hem. What they manage, I thought, can you ... Here are my "hard-sewn" tips for designing such a hem:
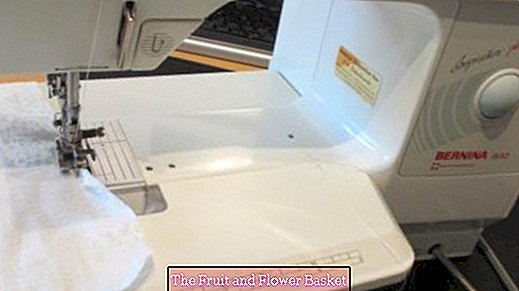
To the materials / tools (see also the photos)
If possible
- use a rotary cutter to cut the edges to be edged, so that the fabric is optimally less fraying and the formation of the hem is facilitated,
- one Edge quilting foot which is great for quilting along an edge
- on one Extension table work so that the fabric always lies flat in front of and behind the presser foot and can not warp,
- the sewing machinesspeed to the lowest level so that you can work, control and, if necessary, correct while sewing in front of the presser foot,
- the Needle position choose "down", d. H. When the sewing process is interrupted, the needle automatically sticks in the fabric and holds it in place - replacing a hand
- the sewing machinesneedle by 1 or 2 positions from the usual center to the right adjustso that the needle punctures optimally just beside the folded edge of the fabric,
- at high volume / weight:
- place the fabric on the lap in front of the presser foot while sewing - do not let the bottom of the presser foot glide easily behind the presser foot but allow it to rise (!) on the table surface, so that the fabric is not pulled anywhere " becomes
- with the left elbow / forearm slightly "hold" the fabric on the Anschiebetisch so that the fabric around the presser foot (on which it only arrives) can slide absolutely easily.
But now to the proposals that I consider to be decisive:
- Normally, before the actual stitching / sewing the hem edge is formed by hand and put, so that nothing slips. This sticking is difficult but on a very narrow hem edge, because you have so little material in the hand and when inserting the pin this just forgives the just folded fabric and / or slipping out again during the sewing process :-( Therefore, I waive the use of Pins and make the hem edge / envelope after stopping the sewing at a distance of about 7cm to the presser foot, hold this not sewn edge firmly with your right hand, pull it lightly (!) Tight / smooth and stroke it with your fingers smooth the left hand well, so that the edge to be sewn is completely flat and can no longer buckle, then sew about 5cm long, stop again, form the hem again, hold with right, press flat with the left, sew ...
- Since you are very active (right-handed) with the right hand, if you have to turn the fabric from the right side to the left = inside, I put mine machine complete aslant back to the right of me away (see photos): Now (at least) I can work much more comfortable from the right and does not have to press my hand in front of the body to want to form directly in front of the belly at right angles to the edge of the table hem.
- The Beginning such seam is very difficult because you still have no material that you can "touch" behind the presser foot. For this reason, put the upper and bobbin thread under the presser foot for approx. 10 cm, push the first centimeter of the seam edge under the presser foot, lower it, touch the threads and keep it tight at the back. Now slowly start sewing and using the threads to transport the fabric back away. That works!
- If you are the last one narrow edges seams, here do not form the hem as described above, because at the longitudinal edges at the beginning and at the end of the fabric probably surmounted slightly oblique. Here only the end of the longitudinal edge slant oblique (see photo) and then continue to design the hem as tested and quilting ... It forms in the best case, a wallet corner ...
- Approximately 5 cm in front of hemThe End again take the long edge and form the hem from here = from its end, hold on and stitch the last few centimeters.
I wish you good luck and I look forward to constructive suggestions / additions - also to inquiries!
Best Schneider greetings - have noticed again that you can not upload more than 5 photos - will add more after setting the tip!


